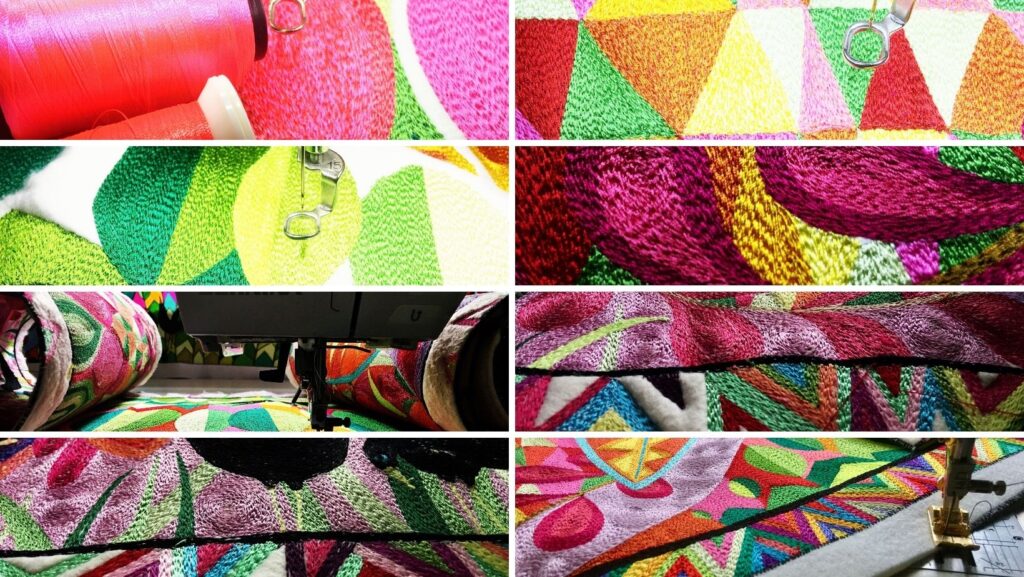
Ok, stitching out a large design is no picnic – but I’m perverse and love every moment of it. Sometimes problem-solving is extremely therapeutic and gratifying. You have a problem, fix it right – next? That’s my attitude.
But working on such a large scale – the finished work measures just over 2m long x 40cm wide – wasn’t easy.
I found ways to take-up the bulk of the work to help get it through the machine. Rolling both ends was by far the most successful – so the work looked a bit like those old rolls we used to use in our piano – ouch – am I showing my age? But I’d also just flip the length back over on itself behind the machine – anything to help distribute the weight.

I’m used to dealing with space issues when I stitch, even though I have a great amount of space both behind and to the left of my machine. You just learn to deal with it and work within the parameters space allows.
The more I stitched, the heavier the work became and the harder it was to roll, so looking after my hands was really important. As soon as I felt discomfort, I exercised or soaked them in hot water for a while. Denis bought a fab little massager, which pummels like a pro and was very effective.
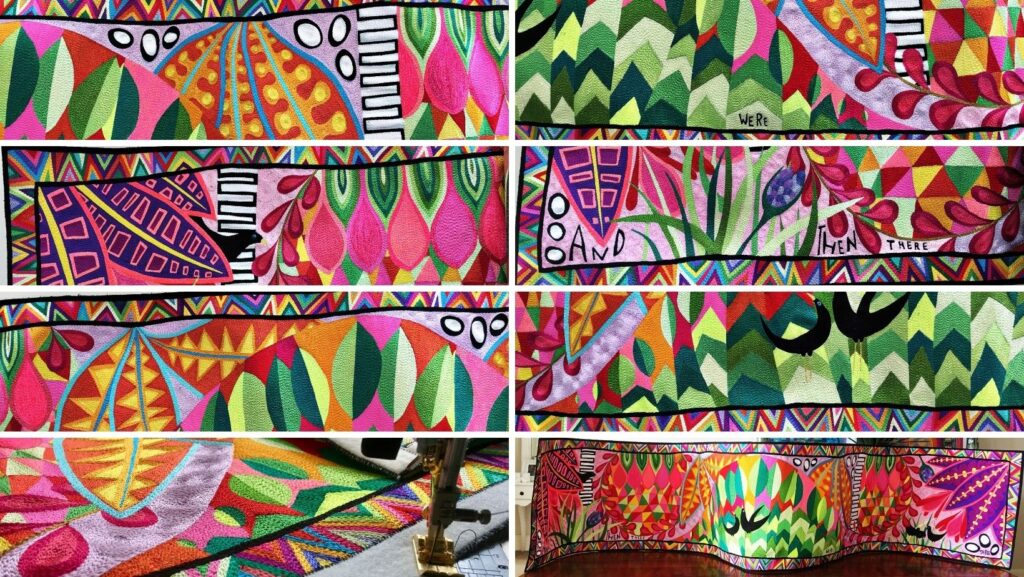
But I still had some issues. I’d used an off-cut from previous work, which was an ideal size width-wise – but only just. And with the type of work I do, shrinkage and distortion is always an issue. Sometimes, I can foresee it, sometimes not. Wherever a lot of threadwork comes together, that’s where the most shrinkage will occur. So at the top, the two groups of leaves on either side of the central green work really ate up the fabric. This then meant my thin, black first border lines had a little more movement than I’d intended.
Another problem was that the patterned geometric border also did the same thing in places – depending on the order of stitching those triangles – or simply because the substrate had a mind to. Who knows? Which meant, in some areas, I didn’t have enough fabric to finish with a final black border, which the work really needed. Plus the edges were terribly uneven and wobbly. Now, I don’t mind wavy, organic lines in my work, but I do like the work to be finished neatly and squared off. When it’s hanging, these are the things you notice. They had to be neatened and the only way to do that way to cut back into the work and add extra fabric.
I had to attach another 1″ of fabric around the entire work after I’d neatened the edges then I wondered if I should simply stitch it that size rather than the thinner border. I began on one shorter side, but it was obvious that a 1″ stitched fabric became almost 11/8″ or more and in solid black, it was just too heavy and draining – it sucked all that amazing colour away. When you have a problem – fix it. I had to cut it back to the originally designed size of roughly 1/4″ – why don’t I just trust myself?
It was difficult to stitch across some of the geometric work – it was thick and had bubbled. For some triangles, I had to cut out small ‘v’s’ of fabric to away some of the puckering before stitching. Thankfully with felt, you can do this with ease – almost, but it’s fiddly and time-consuming. The cuts were small, and it did help take out some of the distortion. Some distortion I like, too much is just hard to work with.
By this time I had steamed the work from the back, as a means of relaxing both the fabric and the stitching. It helps reduce some of the movement and I knew I could work with what was left. I used a damp tea towel and my iron on the cotton setting with plenty of steam, working over the towel, then taking that away and just shooting it with jets of steam. I love doing this – it really helps ‘relax’ the work.

My concern now was ensuring the work was fairly even across the width – as it’s 2m long too much variance would be noticeable. I measured and re-measured before I cut away the excess fabric and allowing for all the distortion throughout the work, I’m very pleased that there’s only a .5cm variance. Phew.
To finish, I worked a close zig-zag stitch around the entire work – I don’t change the foot, just work it with the feed dogs down and feed it through slowly. Then I over-stitched with a straight stitch to merge it into the border stitching. I’m not a fan of a zig-zagged edging – I like it to look as though the straight stitch goes right to edge. This gives a very neat, very crisp finish.
A final check pin-pointed 20-odd small things to fix – 19 tiny areas where I had either mis-traced or found the lines difficult to interpret or had simply neglected to go back and fill in – it’s surprising how easy they are to miss. I also had a number of black threads on the outside border which needed cutting back. Using two threads through the needle sometimes causes this, some of it was from cutting back into already stitched work as the threads just fray like mad. I discovered a quick lick with a flame was the fastest and easiest way to eliminate these.
And finally, my Artist Statement was written, amended and re-written several times, so that was good to go. I had everything ready for submission, then the idea came to present this as a standing piece – not as a hanging piece. The beauty of textiles is – and should always be – the ability to view the back of the work as well as the front. For some reason, I see more of the hand of the maker in the back rather than the front, no matter if it’s hand embroidered or machined.
Now my work starts out soft – two layers of felt, one thick bag batting and one thin plus a covering of light fusible stabilizer – these do not make for a stiff work. But by the time I finish stitching, my work is like pliable cardboard – and makes a ‘drummy’ noise when tapped.
That’s what all that beautiful thread does – it changes the ‘hand’ of the work, entirely. So while this was almost able to stand on its own when placed in a serpentine, snaking orientation – notice the word almost, I was worried if people were walking around the work, just one gentle tap or knock would have it falling over. Not acceptable.
I contacted a business that worked in shop-fittings explaining my requirement for a custom-made set of four clear perspex textile support stands especially for this work. I had to design what I required and emailed my drawings through. Denis also found some metal memo holders which, surprisingly, worked very well and looked really contemporary. These would eventually be my preference.

