What to do when you run out of a particular coloured thread?
Well, it happened to me recently and it made me think about my options.
I could have waited till I could buy some more, or I could have used a contrasting colour, but I just happened to have a roll of white cotton thread sitting right next to me – and all my markers staring at me on the shelf on my desk.
And that’s when the idea came to me to colour my own thread.
How?
It’s surprisingly easy, the most difficult thing was having the courage to actually colour the thread once the stitching was completed.
It would be prudent to use good-quality markers suitable for the intended use of your embroidery. Meaning that if you need to wash the item, then make sure you use the appropriate markers.
It was really a lot of fun creating the exact colours I wanted in my threads – plus I went over areas already stitched that I wasn’t happy with, colouring already coloured threads to make them brighter. And that worked too.
Here’s what I did:
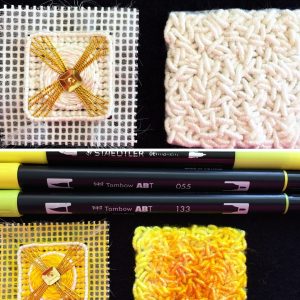
- I used 100% mercerised cotton – that’s what’s on the label. It was purchased at a $2 shop just before lockdown, and fortunately, I bought two large rolls. It would be about half the thickness of normal six-stranded cotton floss used for embroidery.
- Make your stitches.
- Choose your coloured markers – sampling on a scrap of fabric would be a good idea.
- I used Tombow Dual Brush Pen Art Markers and also Staedtler Permanent markers and found the brush tip with the Tombow markers perfect to work with.
- Before you begin, think about whether you want to completely cover the thread, shade it out towards the edge or mix the colours a little.
- Colouring the top of French Knots was simply a matter of dabbing the colour gently over the stitches until I had the colour I wanted – but there was some white left showing and that was fine by me.
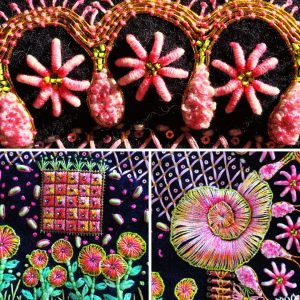
- Colouring the large Nautilus shape was really scary because the threads were so long, but it was a matter of starting with the pink in the centre and working outwards, adding some yellow to the edge, and then finishing with green around the edges.
- I would suggest working slowly and reviewing before adding more colour. With the Nautilus shape, I went back into it three times before I was happy with the outcome.
- The Blanket stitch flowers were coloured in the same way – pink used thickly in the centre, yellow merging in with the pink and green around the edges.
- The Pistil stitch worked above the couched gold coloured thread was also coloured, intentionally leaving little sightings of white here and there for interest.
All in all, this was a huge amount of fun to do – and because the thread isn’t completely coloured just adds more interest and variety for me, so it’s definitely something I’ll be using again and again.
The fact I had both the thread and the markers close by just helped push that idea – and it worked, opening the door to exploring your own creativity even further, which in my view, is always a good thing.
So if you run out of thread, why not colour your own?